A few months ago I was browsing Pinterest when I saw a picture of a Cookie Monster cake and I thought that it would be perfect for Little H's first birthday, the only problem being that it didn't have any instructions. However, being as stubborn as I am and also being slightly overly confident with my cake decorating skills I thought I would be able to recreate it, after all Little H was only going to turn 1 once!
 |
| Cookies... Nom nom nom...! |
A few people have asked me how I made it and I regret not taking step by step pictures but I will go through what I did and as my friend has asked for an Elmo cake for her birthday (April) I will try to remember so I can do a proper post!
Firstly I made a chocolate cake using a 22cm tin, for decorating you will need...
140g butter
280g icing sugar
A couple of drops of milk
Blue food colouring
Ready to roll icing in white and black
Chocolate chip cookies
Piping bags
Icing nozzle 233
I cut out a large semi circle freehand from the ready to roll black icing, this was then placed onto the cake where the mouth would be.
To make the buttercream icing beat the butter until soft and then add the icing sugar bit by bit, when it is all mixed in add a few drops of milk to get the required consistency, you want the icing to be thick enough to hold its shape but not to firm as it will be difficult to push it through the icing nozzle. Add the food colouring slowly, for these amounts I added one and a half teaspoons - check the label on the food colouring as there tends to be a limit to how much you can use.
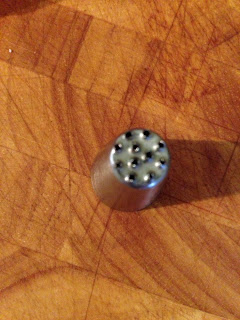
Once the buttercream is mixed fully and is the right shade spoon it into your piping bag with the magical 233 nozzle - if I could be in love with an icing nozzle then this would be it, with its magical fur making skills!
 |
| The brilliant, if a little blurry, 233 icing nozzle |
You need to push the icing and pull away when the it reaches about 1.5-2cm, I also pulled slightly in different directions to give it a more realistic fur look. I started by outlining the black icing semi circle and then worked in sections - don't forget the sides either. Also look at the cake from different angles as I found there were a few bald spots.
After the cake was covered in fur I then cut out 2 circles from white ready roll icing and rolled 2 balls using black ready roll icing - I then assembled the eyes and flattened the black balls keeping a slight curve, these were then placed onto the cake.